Teaching Clock for Learning to Tell Time
Article
September 10, 2024
Time flies when you’re having fun! So, what better way to help your child learn to tell time than with the help of a fun character? Thanks to Flo, Alloprof’s friendly mascot, it will be a breeze. Below, you will find a printable teaching clock and a worksheet.
Grade
1-6
Table of contents
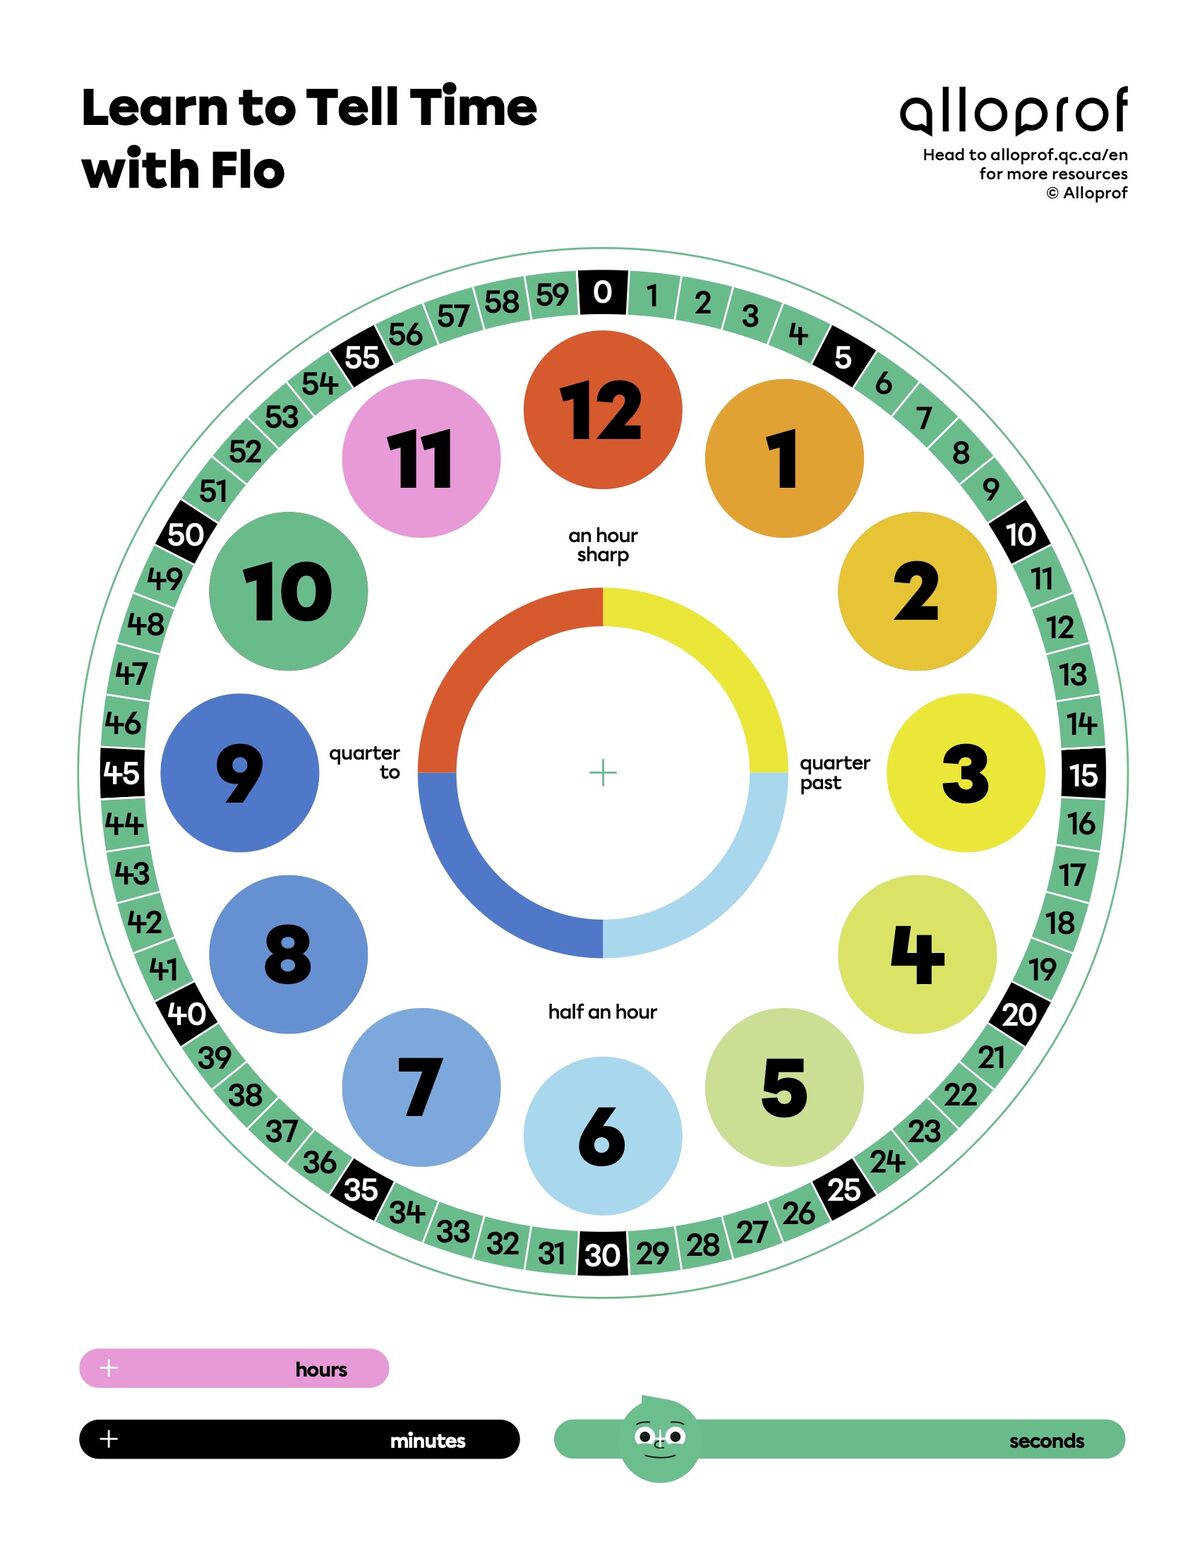
Learn to Tell Time with Flo
Nowadays, digital clocks can be found everywhere from microwaves to smartphones. However, even if grandfather clocks have long gone out of style, students still learn to tell time on an analog clock in elementary school. Why? Because knowing how to tell the time on an analog dial has a number of educational benefits:
- It helps your child practise mathematical operations such as multiples of 5 and 10 up to 60.
- It fosters autonomy, as your child will not have to ask adults what time it is.
- It helps your child organize their daily routines and learn to manage their time.
- It helps them visualize the future, the past, and the present.
- It can help your child understand fractions by introducing them to the concept of half hours and quarter hours.
- It helps develop skills like patience, discipline, problem solving, spatial reasoning, and critical thinking, since analog clocks require observation and mental math to determine what time it is.
- Etc.
To dive deeper into this topic, you can watch these Alloprof videos with your child. They explain the different aspects of telling time for students in different grade levels.
How to Use the Teaching Clock
1. First, ask your child to look at the dial and describe what they see, before they try to tell the time. They will point out the numbers, the three hands, and the different colours.
Explain the following to your child:
- 1 hour is made up of 60 minutes.
- 1 minute is made up of 60 seconds.
- The clock face only shows 12 hours, even though there are 24 hours in a day.
- The numbers on the clock represent both the hours and the minutes in five-minute intervals.
- The second hand counts the seconds and never stops.
- The big hand counts the minutes—it moves forward every 60 seconds.
- The little hand counts the hours—it slowly moves to the next number over 60 minutes.
- Etc.
2. Ask your child to do the following:
- Point to the little hand
- Point to the big hand
- Read the time on the clock
- Etc.
3. Not all watches have a second hand, but it is still a good idea to teach your child what it looks like and what it does. Even though we do not include seconds when we tell time, it can help them grasp the idea of how we divide time up. You can tell them that the second hand needs 60 seconds to go around the clock face once—that equals 1 minute. Every time the second hand goes all the way around the clock, the minute hand moves forward 1 number.
4. Encourage them to do the exercises on the worksheet included with the clock.