Subjects
Grades
The technological design process aims to build technical objects that are intended to solve a problem and to meet an individual or a collective need.
The technological design process is divided into 4 main stages:
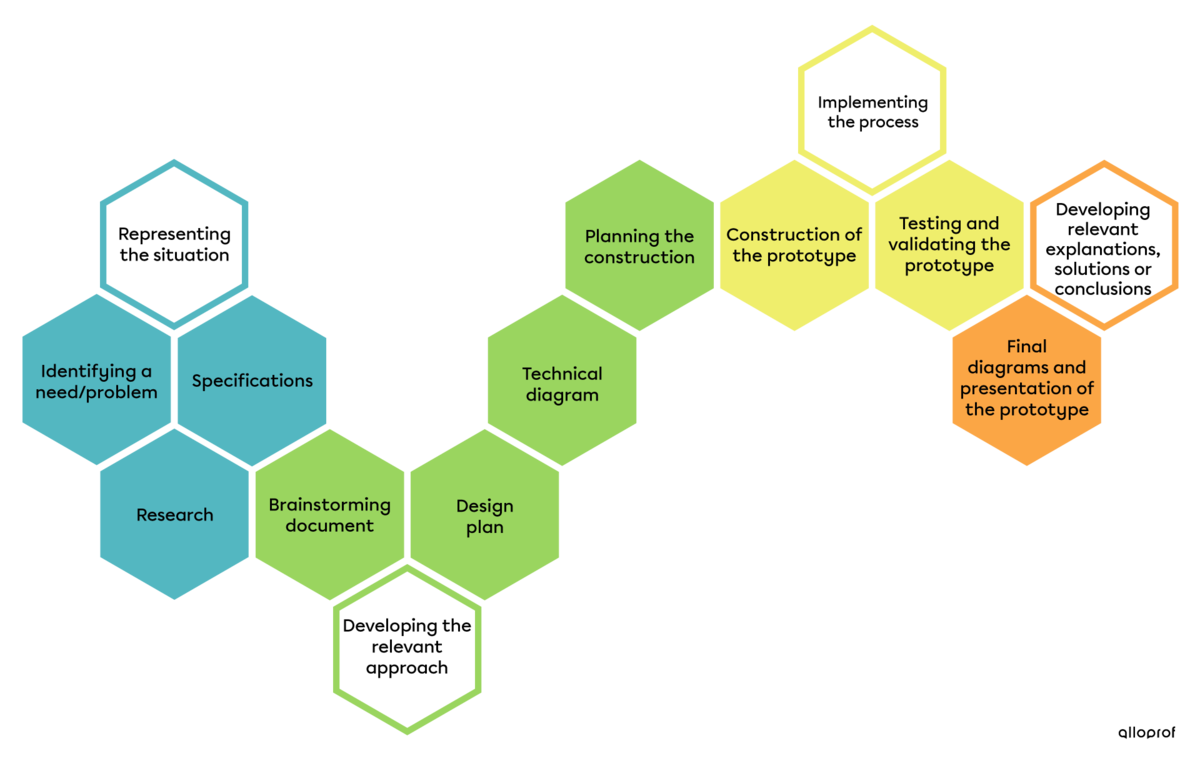
Steps of the technological design process
Usually, a technical object is designed to meet a need. To design a relevant object, first assess the situation to ensure proper understanding.
The technical object must meet a need. In a technological design process, this need must be clearly identified. To achieve this, ask the following questions: What is the problem? What is missing? What is needed?

Moments in the video :
Research is the stage at which the object that meets a specific need must be defined. It is therefore necessary to identify the characteristics of the object that is required to meet the need.
This step involves verifying whether the object that one wishes to design already exists on the market and if it could be improved. If the object does not already exist, it is necessary to research the materials and construction techniques that can be used to make the object from scratch.

Moments in the video :
Next, specify the need and the constraints to be met during the technical design process. This information is recorded in the specifications.

Moments in the video :
To find out how to write the specifications, read the concept sheet on this subject:
Once the situation is well represented, it is time to develop the relevant approach. This is when all the preparation stages required before the actual manufacturing of the object are planned out.
Ideas can be organized by representing them in an brainstorming document. There is no one-size-fits-all way to do this. It can include reminders about the constraints to be respected, sketches of the parts, draft ideas for the materials to be used or images of already existing objects. The purpose of the brainstorming document is to have an overview of the ideas that lead to informed choices.

Moments in the video :
Once a good idea of the desired prototype is established, a design plan can be created to illustrate how the object operates. It is a simplified drawing of the object that allows one to visualize the forces, motions and links involved.

Moments in the video :
To find out how to make a design plan, read the concept sheet on this subject:
The next step is to make a technical diagram. It provides the information required to manufacture the parts of the object. It indicates the names of the parts, the materials used and the way in which the different parts are arranged (linking and guiding components).

Moments in the video :
To find out how to make a technical diagram, read the concept sheet on this subject:
Once the diagrams are made, it is important to plan the construction of the technical object to ensure that it is built logically and efficiently. The steps are recorded in a table that includes measuring and laying out, machining, finishing and assembly. The following information is included for each task: its description and time allocated for its completion, the materials and tools required, the name of the person responsible and the date of completion.
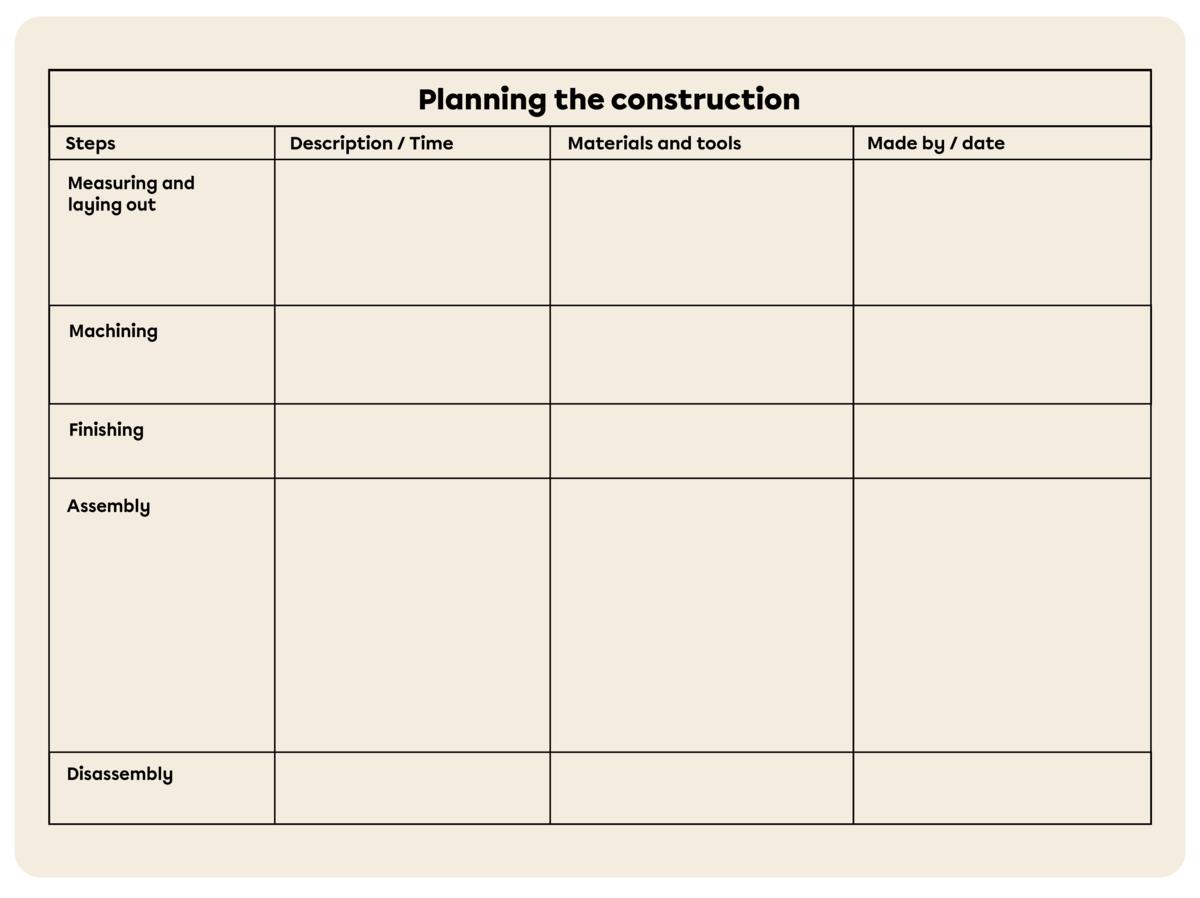
Planning the construction
Moments in the video :
The preparation and planning steps for the construction of the object have been completed. The next steps are building and testing the prototype.
Moments in the video :
To build the object, a manufacturing process sheet is used. It is a document that describes all the steps necessary for manufacturing each part of the object.
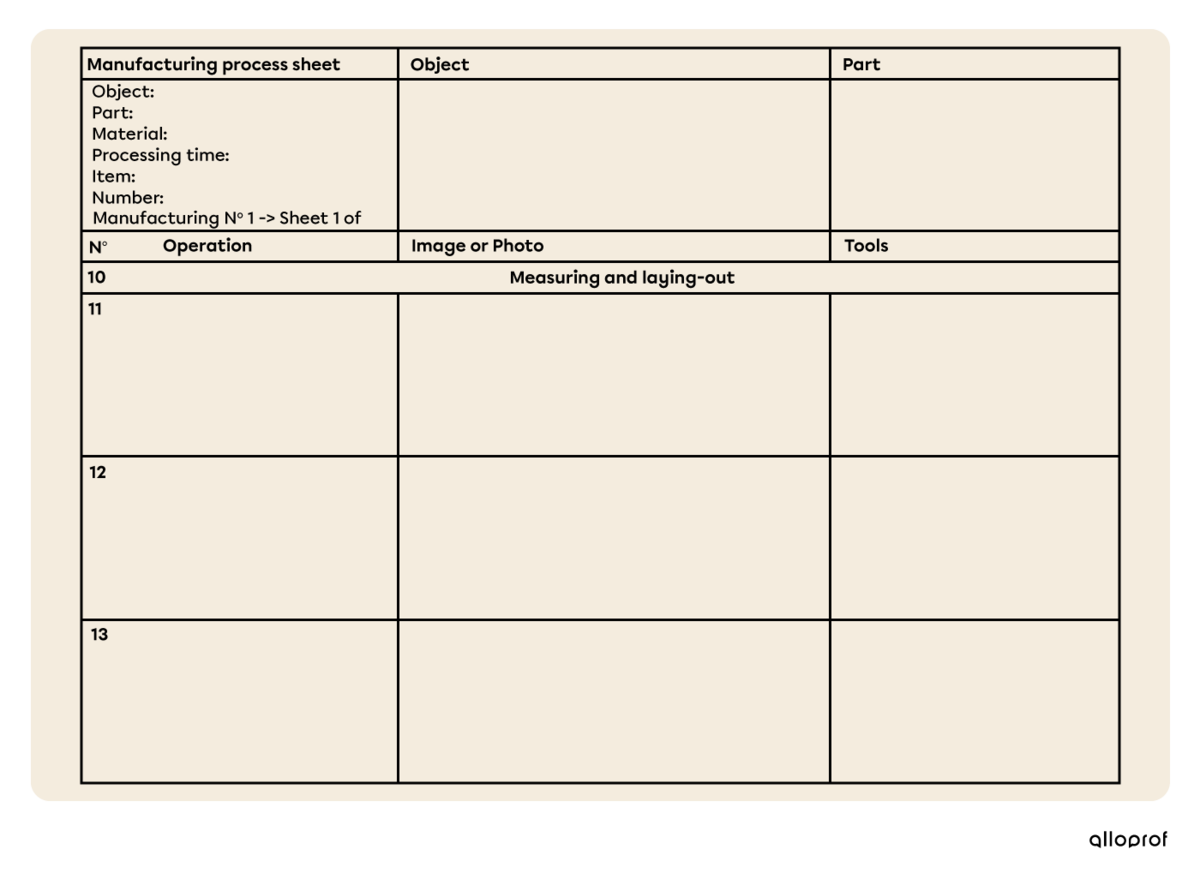
Manufacturing process sheet
To find out more about the manufacturing process sheet, read the concept sheet on this subject:
Once the parts are manufactured, they are assembled using the assembly sheet, also called the process sheet. It is a document that describes the order of the assembly steps, the assembly techniques, as well as the linking components to be used.
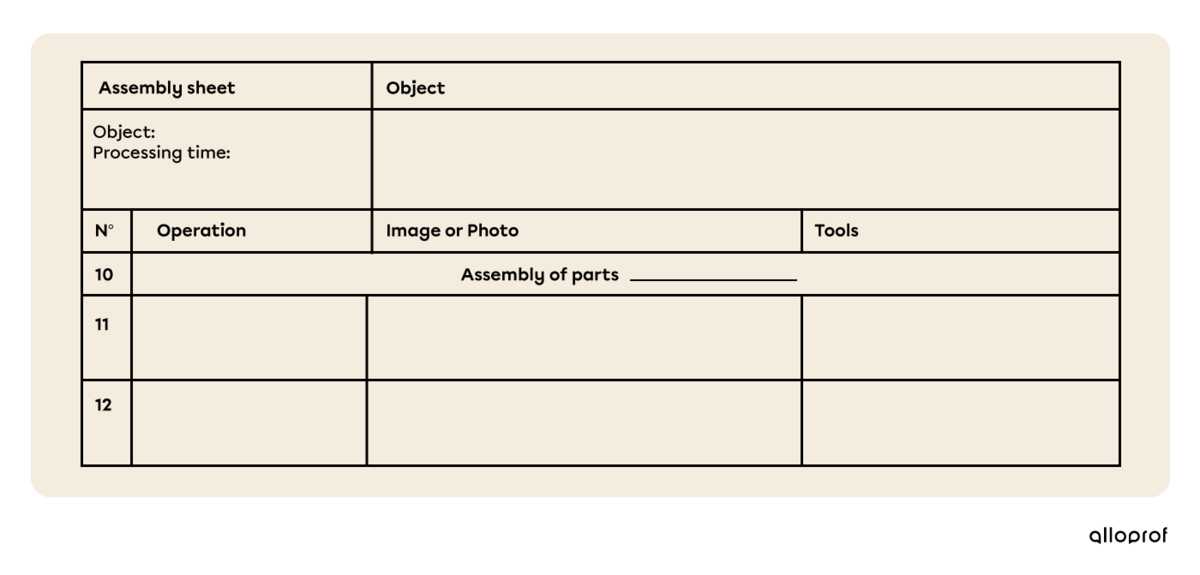
Assembly sheet
To find out more about the assembly sheet, read the concept sheet on this subject:
Once it is built, the prototype must be tested and validated. This step requires testing the prototype, then doing a technological analysis. To analyze a technical object, questions about its functioning, the scientific principles involved and the manufacturing and maintenance processes are asked. Sometimes modifications must be made to the prototype while keeping in mind the end goal, which is to meet the initial need.

Moments in the video :
Finally, it is necessary to provide feedback on the process by identifying the difficulties encountered and proposing the solutions adopted.
In this last step, difficulties encountered along the way and modifications made to the original plan are collected in a logbook, also called the technological process file. The logbook serves as a reference for presenting the process followed to obtain the final product in the form of a report. It is written as a narrative text and includes the final versions of the design plan and the technical diagram.
Moments in the video :