Subjects
Grades
Here's how to draw an oblique line in technical drawing. Before starting to draw, you must first
fix your sheet of paper to the drawing board.

Moments in the video:
The equipment needed to draw an oblique line with a set square is as follows:
A sheet of paper properly attached to the drawing board
A t-square
A 45° square and/or a 30° - 60° square
A pencil
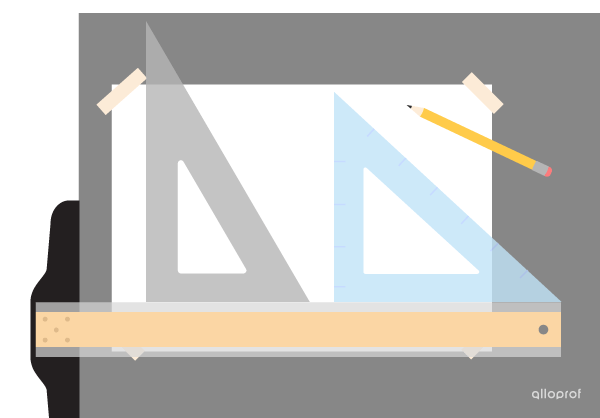
The materials to draw an oblique line with a square.
Select the appropriate square according to the angle of the oblique line to be drawn.
By correctly positioning a 45° set square or a 30° - 60° set square, you can draw oblique lines at 30°, 45° or 60° to the horizontal.
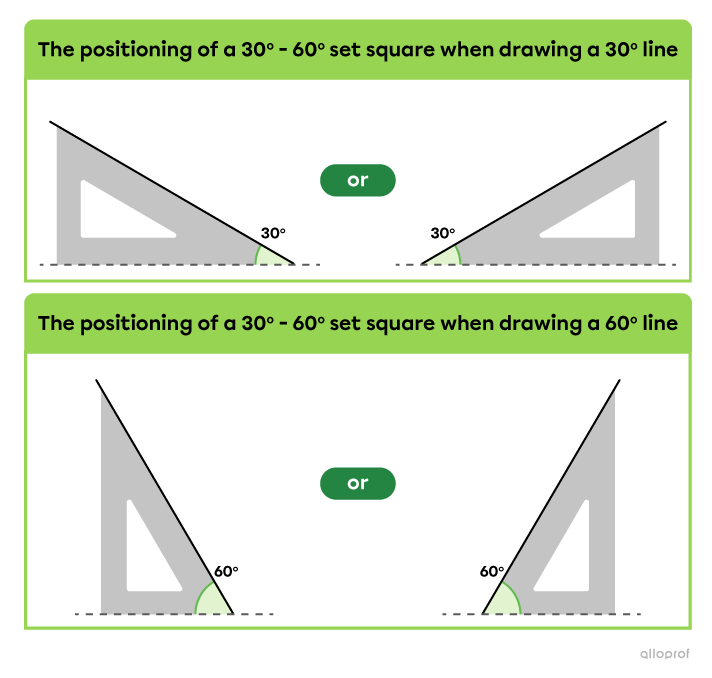
The positioning of a 30° - 60° set square
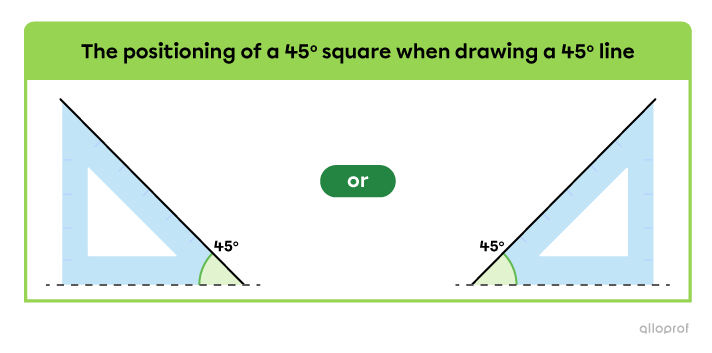
The positioning of a 45-degree square.
Press the t-square head against the edge of the drawing board.
Right-handed people should press the t-square on the left edge of the drawing board, while left-handed people should press on the right edge.
Slide the t-square up or down so that the top edge of the blade is at the point where the oblique line begins, then hold it firmly to keep it in place.

The positioning of the t-square on a drawing board to draw an oblique line.
Press the square against the top edge of the blade to obtain the desired angle with the edge of the square.
Trace the oblique line along the sloping edge of the square with the pencil.

Tracing an oblique line using a square, t-square and drawing board
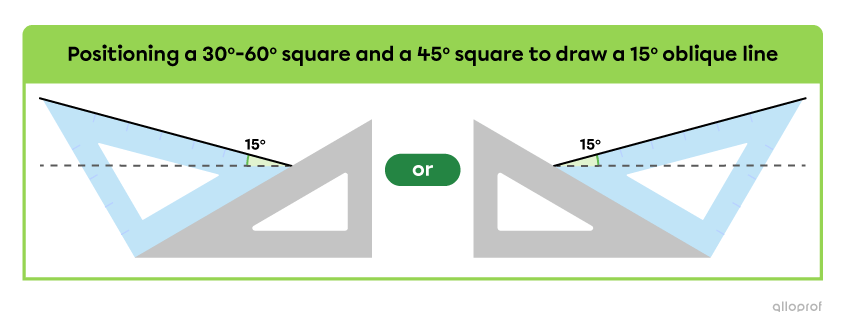
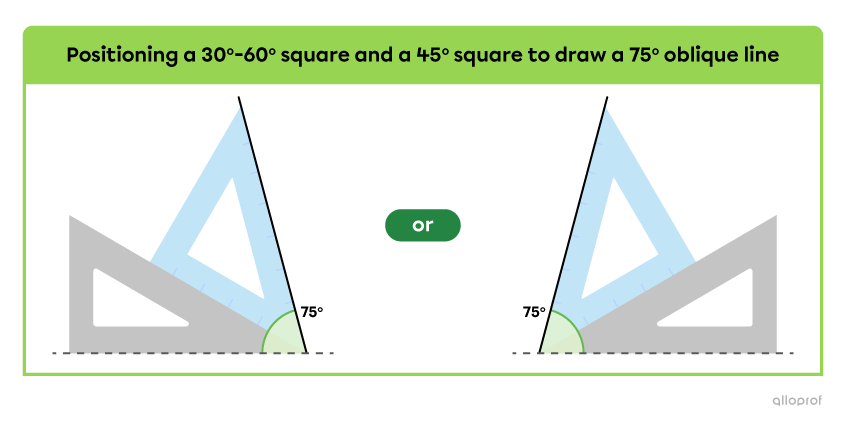
By superimposing a 45° square and a 30° - 60° square, you can draw oblique lines at 15° and 75° to the horizontal.

The equipment needed to trace an oblique line with a protractor is as follows:
A sheet of paper properly attached to the drawing board
A t-square
A protractor
A ruler
A pencil
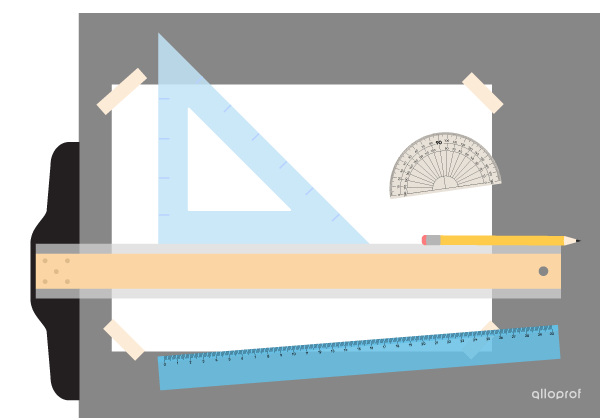
Materials for tracing an oblique line with a protractor
Draw a first point where the oblique line should begin.
Press the t-square onto the edge of the drawing board.
Right-handed people should press the t-square on the left edge of the drawing board, while left-handed people should press on the right edge.
Slide the t-square up or down so that the top edge of the blade is close to the point marked in Sep 1, then hold it firmly to keep it in place.
Press the protractor against the top edge of the t-square, then align its point of origin with the point traced in Step 1.
Measure the desired angle using the protractor and draw a second point just above the scale.
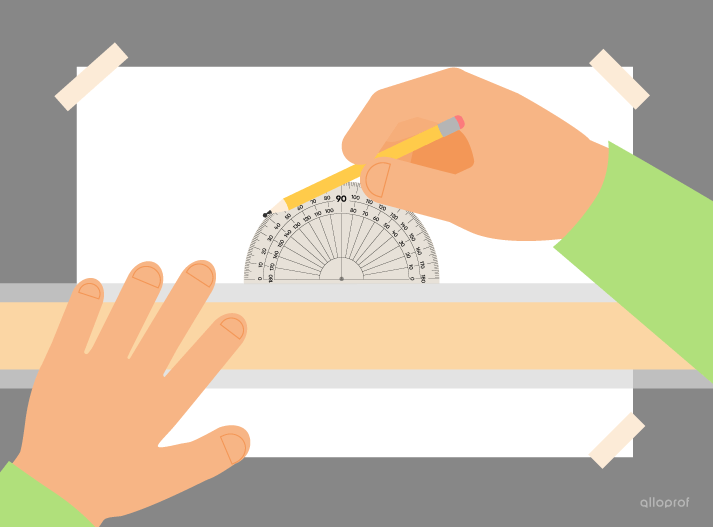
Draw a second point at the angle measured using a protractor.
Remove t-square and protractor.
Connect the two points by drawing a straight line with a ruler.
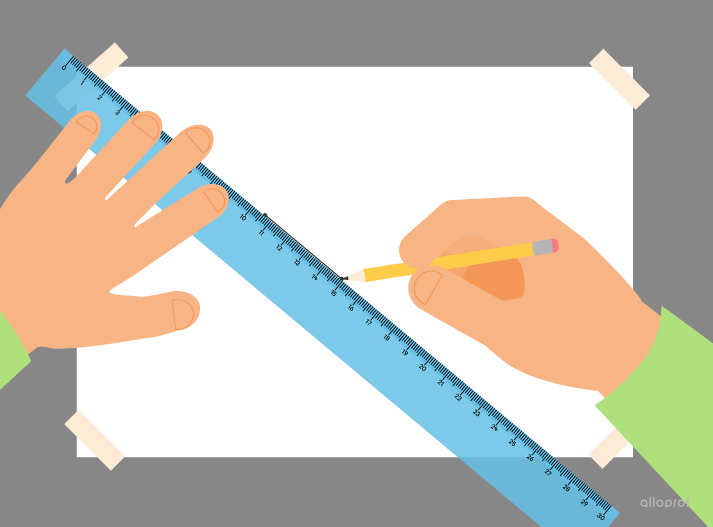
Tracing an oblique line.