5 science experiments to do with your elementary school students

Article

It can be a challenge to find creative, inexpensive, and practical science experiments geared toward elementary schoolers. In this article, Alloprof suggests five educational activities that will spark your students’ curiosity and interest in science.

Each activity has corresponding concept sheets or videos that dive deeper into the science behind the experiment. Though most of these concept sheets are intended for high school students, you can use them to review concepts before you give your lesson or as a reference when answering student questions.

Table of contents:

Tips and tools

To help your students get familiar with the scientific method, you can encourage them to formulate hypotheses and think about what might happen during and after the experiments. After each experiment, discuss the results and ask students to determine whether their hypothesis was correct and share their observations with the class. You can also download Alloprof’s “Do Science with Flo” poster, which outlines the key steps of the scientific method, and post it in your classroom so your students can refer to it as needed.

Floating ink experiment

Dry erase markers are a classroom essential. In this experiment, students will learn about the science behind dry erase markers by creating “magical” floating drawings.

Materials:

  • A large bowl of lukewarm water (or a few, if you have a big class)

  • Dry erase markers (one or two per student)

  • Metal spoons (ideally one per student)

  • Card stock (two or three pieces per student)

Instructions:

Ask your students to draw a picture on the back of a spoon in dry erase marker, making sure not to press too hard. All the lines in the drawing should be connected. Next, have them gently dip the spoon into the bowl of water. In a few seconds, the drawing will lift off of the spoon and float on the surface of the water.

Impressive, right? For an even bigger wow factor, have your students place a piece of card stock on top of their design. The floating ink will instantly stick to it! Let the drawings dry for a few hours before displaying them.

Here are a few tips to make your experiment a success:

  • Some marker brands, like Expo, work better than others.

  • The simpler the design, the more likely it is to work.

  • You can also encourage students to introduce different variables into the experiment: lower the spoon more gently into the water, change the temperature of the water, use a different spoon, and so on.

Why this experiment works:

Dry erase ink is a mixture of two substances: a soft solid substance called resin, and transparent alcohol.
The resin dissolves in the alcohol to produce a colourful liquid ink. When you draw on a whiteboard, the alcohol in the ink rapidly evaporates, leaving behind layers of resin.

When you use a whiteboard eraser, the resin easily releases from the acrylic surface of the whiteboard, unless there is a very heavy layer of ink on it.

The same logic applies to the spoons used in this experiment. The drawings come off because resin floats in water. This experiment also demonstrates how resin adheres poorly to metal.

How do the drawings keep their shape? Because most types of resin do not easily dissolve in water. That means they stay together in one piece.

De l’encre qui flotte sur l’eau.

Self-inflating balloon experiment

With a little equipment and a good dose of science, you can amaze your students with self-inflating balloons.

Materials:

  • Baking soda

  • A teaspoon

  • One rubber balloon per student

  • One clear bottle per student

  • Funnels or paper cones (to share)

  • Vinegar

Instructions:

Inflate and deflate the balloon to stretch it out a little. Pour a small amount of vinegar into the bottle. Using the funnel, pour three teaspoons of baking soda into the balloon. Stretch the opening of the balloon around the neck of the bottle, making sure all the baking soda stays in the balloon. After a countdown to build suspense, have your students gently shake the balloons so the baking soda falls into the bottle. The baking soda and vinegar will start to bubble, and the balloon will inflate by itself like magic!

Why this experiment works:

The most common way to inflate balloons is by blowing into them. You can also fill them with helium to make them float. Air and helium are gases. The carbon dioxide bubbles in sparkling water, the air we breathe, and the bubbles in the mixture inside the bottle are all examples of substances in a gaseous state. The gas that inflates the balloon in this experiment is the product of a chemical reaction between the baking soda and vinegar.

Gases take up a lot of space because their particles are loosely held together and move freely. That means the gas in the bottle wants to escape so it can expand. However, since the balloon is keeping it contained, the gas fills all the space available to it, thus inflating the balloon.

Des « ballounes » autogonflantes.

“Eggstra” strong eggs experiment

Cracking an egg is a piece of cake. Ask your students whether eggs are fragile, and they will probably say yes. This experiment puts that assumption to the test!

Materials:

  • Raw eggs

  • A cutting board or another flat, solid object

  • Eight rolls of tape (or anything else that can hold an egg upright, like an eggcup)

  • Weights (dumbbells, bricks, heavy books, rocks, cans, etc.)

  • A large plastic bag or tablecloth to keep the work table clean if one of the eggs breaks

  • A scale

Instructions:

Set an egg in the tape roll (or other egg holder), narrow end up. Place a second roll of tape (or other egg holder) on top of the egg. Add bricks (or other weights) to the scale until you get to 4 kg. To avoid breaking and wasting eggs, do not exceed 4 kg. Place the cutting board (or another flat, solid object like a thin book) on top of the top roll of tape, then carefully stack the weights on top. The egg will stay intact!

Then, ask students how much weight they think four eggs arranged in a square can support. If the weights are properly centered, the eggs will support up to 16 kg without breaking.

One way to introduce or review the difference between mass and weight is to ask students what would happen if you did the experiment on the moon, where the gravitational force is six times weaker than on earth.

Why this experiment works:

Arches and domes can support a great deal of weight, and they are even considered some of the strongest geometric shapes in architecture. This little exercise may help illustrate why: take a sheet of paper and roll it into a tube. Then, stand it on end and press down. The tube will stay fairly rigid. The same logic applies to eggs: their elongated shape gives them high compressive strength when placed upright.

Their shape also distributes the weight of the bricks across the entire eggshell. As a result, every little piece of the shell is supporting just a fraction of the weight of the bricks.

In this experiment, the weight of the bricks and egg exert a force on the table. In return, the table exerts an equal and opposite force on the bricks and the egg. This force is distributed throughout the shell, like the weight of the bricks. This means the egg is held in a sort of vice between the bricks and the table.

The forces from the table and the bricks meet at the center of the egg. This is where it will break if too much weight is added.

The four-egg experiment demonstrates the concept of pressure, that is, a force applied to a surface. Since the force of the bricks is distributed between the four eggs, the pressure is lower, and you can add four times more weight than in the single-egg experiment.

This principle also explains why our feet do not sink into the snow when we wear snowshoes: they have a wider contact surface than our boot soles.

If you really want to impress your students, you can place two rows of open egg cartons on the floor in a path, then walk across the eggs barefoot like the teacher in this video. Note that you probably want to do this on top of a tarp or tablecloth.

Des œufs incassables (ou presque).

Gummy bear osmosis experiment

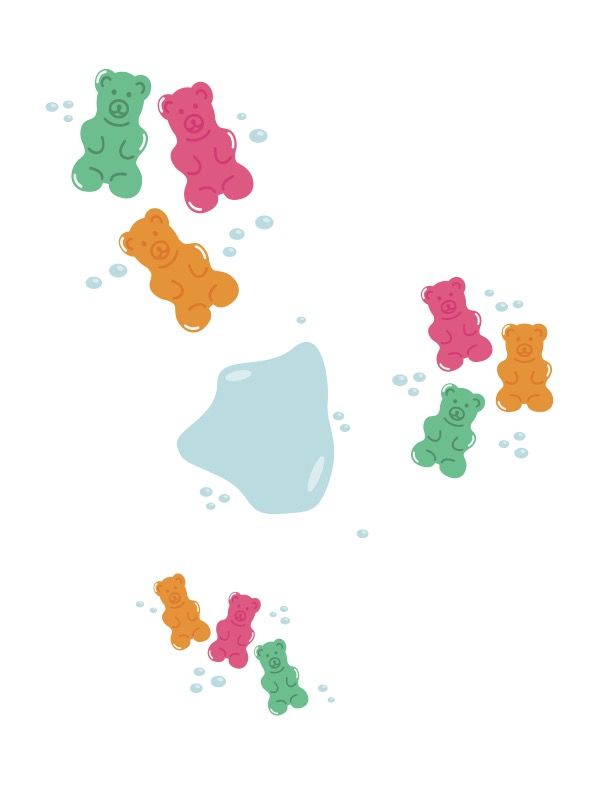
Gummy bears are a delicious treat, but they also make excellent test subjects. In this experiment, students will place gummy bears in sugar water, salt water, and plain tap water, and observe what happens. Some of the gummy bears will shrink, while others will grow. Tip: for a fun twist, you can relate the experiment to the Goldilocks story!

Materials:

  • Gummy bears (at least a dozen per experiment, so you can have four sets of three)

  • Hot water (to be handled by the teacher only) and room temperature water

  • Salt (at least 8 tablespoons per cup of water)

  • Sugar (at least 8 tablespoons per cup of water)

  • A measuring cup with a spout

  • A spoon

  • Three bowls or containers

Instructions:

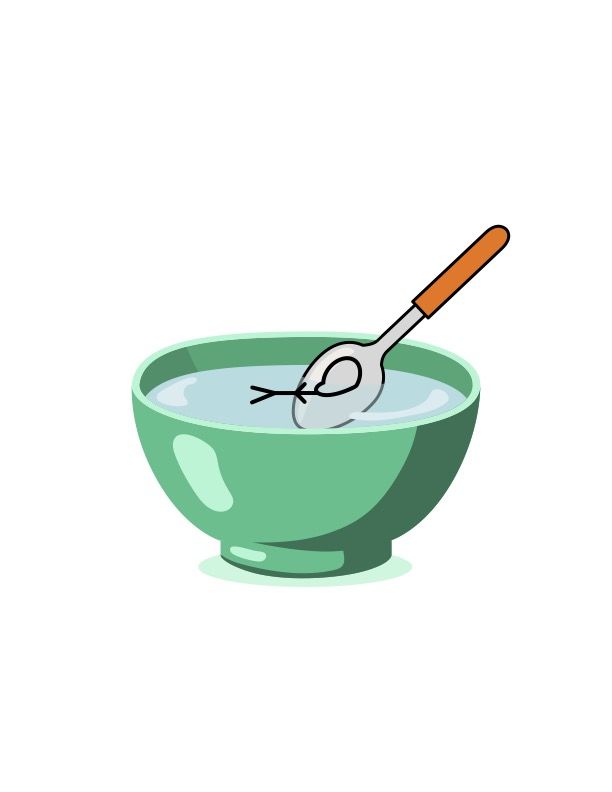
Add salt to a bowl of hot water and stir with a spoon to dissolve. Keep adding more salt until it no longer dissolves completely and settles at the bottom of the bowl. Repeat this process with the sugar in a second bowl. Finally, fill the third bowl with freshwater (tap water). You now have your three different baths.

Allow the water to cool to room temperature. When the water has cooled, place a few gummy bears in each bowl. Leave a few out of the water so you can compare their size later.

Leave the gummy bears in the water for several hours, ideally overnight. Surprise! Some grow a little (sugar solution), some will grow a lot (freshwater), and some will shrink (salt solution).

Why this experiment works:

This experiment explores osmosis, the movement of water through a barrier (like a gummy candy). Gummy bears contain water molecules. Water molecules naturally move toward areas with higher concentrations of salt or sugar. Because of this, the gummy bears in the experiment will grow or shrink as water moves in or out of them.

In the bowl with tap water, water moves into the gummy bear, and the gummy bear grows. Why? The water moves to equalize the concentrations of dissolved substances in the water. The water outside the gummy bear does not contain any salt or sugar. The interior of the gummy bear contains water and sugar trapped inside the pockets of gelatin. Because the sugar concentration is higher inside the gummy bear, the water moves into the candy.

(Think of it as a sugar cube dissolving in a cup of water. If you let it sit long enough, the water at the top of the cup will be as sweet as the water at the bottom.)

What about the salt water bath? In this case, the water outside the gummy bear is filled with salt. The gummy bear itself contains water and sugar. Salt molecules are much smaller than sugar molecules, so more of them can dissolve in water. This means that the concentration of salt in the water is higher than it is inside the gummy bear. As a result, water moves out of the gummy bear to try and equalize the concentrations, and the gummy bear shrinks.

The gummy bear in the sugar water will grow even though there is sugar in the water and in the candy. This tells us that there must be more sugar inside the gummy bear than there is in the water outside it.

What about other candies?

You might wonder why gummy bears change size while other candies (like mints) just dissolve. Gummy candies, unlike mints, contain gelatin (which does not dissolve in room temperature water) and sugar (which does). At the microscopic level, gelatin contains tiny pockets that can hold liquid. As you can see in this experiment, these pockets can hold a lot of liquid!

Des oursons osmotiques.

Dyed cabbage experiment

Just like humans and animals, plants need water to survive. They use their roots to absorb the water they need. The roots then transport the water to the surface, and the xylem (the plant’s conducting tissue, made up of tiny vessels) distributes the water throughout the plant. In this two-day experiment, your students will explore and visualize the movement of water in plants.

Materials:

  • Napa cabbage (Chinese cabbage) leaves or celery stalks with leaves (one cabbage can be shared between about four students)

  • Clear glasses or jars (at least one per student)

  • Food colouring in bright colours (avoid green and yellow for a more impressive effect)

  • Water

Instructions:

Fill the jars three-quarters of the way up with water. Add about 10 drops of food colouring. Place a cabbage leaf or celery stalk in each jar. Leave them overnight and then look at them again the next day. You should see that the leaves have been dyed by the coloured water!

Why this experiment works:

A plant’s roots transport water to the surface, and tiny tubes called xylem distribute the water to the rest of the plant. The xylem vessels form a system of hollow tubes that act like straws, allowing the plant to transport water all the way up its stem and to its leaves.

If you dip a slim tube (like a straw) into a liquid (like a glass of water), the liquid will climb up the tube.This is called capillary action. The fibres in celery are made up of multiple xylem vessels grouped together. Did you know that a celery stalk is not a stem? It is actually a part of the leaf called the petiole.

When the water reaches the top of the plant, it evaporates through tiny holes in the leaves. This process is called transpiration. Transpiration causes water to evaporate from the top of the xylem vessels. As this water is evaporating, more water is drawn in by the roots to keep the xylem vessels full.

Des choux teintés.

References

Access our most relevant tools!

To make your life a little easier and receive some of our best Alloprof tools by email, subscribe to our teacher newsletter. You could even win a gift card for your favourite bookstore!